A cellar for storing vegetables, food supplies, and canning is a traditional, indispensable element of country life. A well-built cellar maintains almost the same temperature, no matter what time of year it is. Thus, you can be sure that vegetables, fruits, pickles, and jams will be reliably preserved. No one will say that making a cellar with your own hands is easy. Of course not. But information about “what and how” will not hurt.
It is worth considering that the cellar and basement are different rooms, but they have the same purpose - you can store food and gifts from the seasonal harvest. Proper basement ventilation is the main factor to pay attention to during construction.
Equipped storage under the house (in other words, a cellar in a cellar) is convenient, since everything is nearby: in winter you don’t need to get dressed to go outside, as if it were located separately. Also, you will not need to insulate walls and ceilings, because such a room always maintains a positive temperature.
The cellar is a purposeful building; it can have any area and can be equipped with all kinds of shelves, stands, and racks. A properly adjusted ventilation system, waterproofing, and thermal insulation will create an optimal temperature level for storing food. Unlike a basement, a cellar can be built in any desired location in the local area.
A separately located cellar can become part of the design concept and harmoniously complement the style direction of the garden plot.

Cellar design or why the basement is the coldest place in the house
This factor is explained by the laws of physics - despite the connection between the basement space and the outside air, in the summer the basement will be the coldest place in the house. In winter, the basement will be warmer, even if the rooms above are not heated.
This phenomenon is due to the fact that warm air currents are much lighter than cold ones, and therefore rush upward. And the cold air tends downwards and concentrates in the basement.
In the summer, the house receives heat from the sun-heated roof and heated walls, but, of course, the sun's rays do not reach the basement. But even if you don’t live in a country house in winter, and the house is not heated in any way, the basement will maintain a temperature slightly above zero. The lower the basement is, the warmer it will be in winter.
How to build a cellar
It is better to start planning the stages of building a cellar with your own hands when the weather gets warmer, but it is better to determine the groundwater level in spring or autumn.
There are three main types of cellars: above ground, in-ground, and semi-in-ground. Soil with a high level of water passage can become the main obstacle to the construction of a classic cellar. It is in such cases that it is recommended to choose a semi-buried or above-ground type of storage.
Stages of construction work:

Cellar ventilation
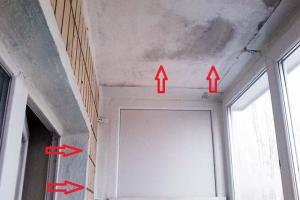
Ventilation of the cellar and basement is an important factor in maintaining acceptable temperature conditions for storing food supplies. Excessive dampness is an eternal companion of all underground premises. If you do not intend to engage exclusively in growing mushrooms, then you should take care to control air humidity.
If the cellar is located in the basement of the house, then the vents in the base of the house foundation (which are laid during construction) will specifically perform a ventilation function. For a small basement, about 5 square meters, such an air exchange system is quite suitable. To prevent rodents from entering, it is better to cover the vents with metal mesh and seal them tightly during frosts.
If you need a large basement, then supply and exhaust ventilation based on natural air exchange will be the best solution. For a separately constructed cellar, as well as a basement, it is necessary to provide two air ducts in advance. The thickness of the pipes (preferably PVC) depends on the size of the room. The most commonly used diameter is 20-60 cm.
The principle of operation of such a system works on the difference in temperatures inside and outside the cellar. The hood (exhaust pipe) is located under the ceiling of the cellar, passing through the ceiling, leaving one end on the roof. The supply pipe also leads to the roof, but its other end, which is located indoors, must be no higher than 100 cm from the basement floor. Grids and dampers at the outer ends of the pipes will protect the air ducts from precipitation and help regulate the level of heat in the room, if necessary.
Ventilation diagram in the cellar:

Waterproofing the basement from the inside
The cellar and basement should be dry - this is an axiom. In addition to standard waterproofing mastics (Aqua, Technonikol, BITUMAST), plasters (Monolit, Polimin, Scanmix), it is advisable to use penetrating waterproofing (for example, Penetron or Millennium).
The most effective methods:
- Penetrating waterproofing is effective, easy to use: applied with a brush to slightly damp walls, floors, and is environmentally friendly. Before use, it must be diluted with water until a homogeneous consistency is obtained.
- Liquid rubber is best applied to pre-primed walls and floors. It is desirable that the surface is smooth - this will facilitate the ideal application of the bitumen-polymer layer and ensure optimal adhesion. After applying and drying the first layer of liquid rubber to strategic places (seams, joints, utility lines), you can reapply the second layer.
- Basement waterproofing with liquid glass works in the same way as penetrating insulation types. This is an extremely effective method with a long-lasting effect and has good breathability and water-repellent qualities.
Insulation of the cellar
It is advisable to take care of the insulation of the cellar during the construction stages. After applying waterproofing layers, foam plastic (density 25) or polystyrene foam boards are most often used - they are used to line the walls of the cellar both outside and inside. These materials are good because they are not affected by fungus and mold, are easy to install, and have a low cost.
Stages of floor insulation:
- The rough surface of the floor is leveled and covered with waterproofing material.
- The insulation is being installed (approximately 4-8 cm).
- Polyphenol (multi-layer reflective insulation) is installed.
- A reinforced screed is placed on top of all layers.
As for the walls, the layering effect also works here:
- Waterproofing layer.
- Installation of foam plastic boards (or other suitable material), for securing which you can use an appropriate adhesive composition.
- Cement screed (small thickness), reinforced with reinforcement for greater reliability. The M-100 cement grade is optimally suited for these purposes.
- Since the cellar is a room with high humidity, to enhance the effect, you can additionally treat the walls with a waterproofing compound on top of the screed.
- The finished surface can be covered with any finishing coating you like (tiles, wild stone, etc.).
It is better to carefully fill all existing joints with polyurethane foam.

Stairs in the basement
The staircase is an important structural element of the cellar or basement. Your safety depends on them, so ladders must be properly manufactured and installed. The most common materials used for construction are hardwood, metal or concrete.

The staircase can be straight, rotary, spiral or attached - it all depends on the individual design of the cellar or basement, as well as on your preferences. The staircase must be strong, reliable, and preferably have railings. The thickness of the steps directly depends on the width of the tread.
It doesn’t matter what material the stairs are made of, but building codes must be strictly observed. The correct width, clearance, slope - these are the main parameters of construction.
A plastic cellar is an innovative alternative to standard cellars or basements. In fact, this storage is a ready-made plastic cube (box), with strong walls, shelves, a ladder, and a hermetically sealed lid. Such storage can be installed quite quickly and is subsequently not afraid of humidity - and this is an important factor for storing food supplies. To make such a container, plastic is used, which contains fiberglass or polypropylene. The ready-made factory version comes with a ventilation system.

A plastic cellar can be installed in any desired location in the local area or under a garage, house, or any building. The only important nuance is the correct installation of the box.
Advantages:
- no temperature changes;
- humidity control;
- protection from rodents;
- does not absorb odors;
- easy cleaning and disinfection;
- not subject to corrosion;
- operational life is more than 50 years.
The installation process in general, step by step:
- A pit of the appropriate size is dug.
- The bottom of the pit is concreted (or a ready-made concrete slab is installed).
- The box is installed on a concrete bottom and secured with slings (or according to the manufacturer’s recommendations).
- The pit with the box is filled with a mixture of sand and concrete, only the entrance cover remains visible from the outside.
It is also worth mentioning the addition that the owners of such cellars sometimes make - we are talking about insulating the walls with foam plastic. Here opinions are divided, since the design itself is self-sufficient and, in theory, does not need improvement. This issue is decided only by the owner, but additional thermal insulation will definitely not harm the box.
Whatever type of storage room you choose, you need to take into account the characteristics of the soil on the site and pay close attention to all construction parameters. A plastic cellar, a separate building, or a basement in a private house, equipped with your own hands to store the gifts of summer, requires accurate preliminary calculations. If you adhere to all construction rules, a self-built cellar will delight you and your loved ones with high-quality preserved products for many years.
Cellar or basement?
Reliably storing supplies throughout the winter is an important task for garden owners, so arranging space for potatoes and other vegetables must be done according to all the rules. In order to prevent the potatoes from sprouting and the lids on the jars from rusting, you will have to not only dig a hole. Ventilation, as well as waterproofing and interior finishing must meet certain requirements.
The main point from which all the differences between a cellar and a basement arise is the purpose of each structure. The basement is partially heated, so it is used as workshops, storage or other utility rooms, as well as garages, as can be seen in the photo. The structure, which is located under the house and is called a cellar, performs a different function, being a storage for:
- vegetables and fruits;
- jars of jam and pickles;
- homemade wine;
- barrels with sauerkraut, cucumbers or tomatoes.
It is necessary to maintain the appropriate temperature inside the cellar; ventilated drawers, shelves and racks are installed here, the successful placement of which is often photographed. The construction of a cellar, unlike a basement, requires less space, and its decoration can be quite simple and uncomplicated.
Is it possible to make a cellar in the basement?
If there is a cool basement under the floor of the house and the temperature in it remains relatively low even in the summer, you can allocate part of it to make storage for vegetables. This option is quite acceptable. But there’s no way to create a basement in the cellar, and you won’t even be able to find photos of such “transformations.”
To build a cellar under the house with your own hands in the basement area, you need to separate a smaller part of it with a wooden partition. Inside you will need to install shelving, make separate lighting and ventilation. To keep the cellar cool, you should install a thermal insulation layer. It is important that heated air does not enter inside, and the temperature is maintained at a level slightly above zero degrees, which is considered the optimal mode for the cellar. It is better if the storage facility has an individual descent and complete autonomy from the main basement. Finishing the cellar should include treating the walls with one of the following compounds:
- antifungal;
- slaked lime;
- copper sulfate.
For thermal insulation, choose polystyrene foam or glass insulation. In numerous photos posted on this site, you can see that the front trim is made from fiberboard or plywood sheets. To prevent soil from the cellar from entering the house, a layer of expanded clay, pebbles, or straw is placed on its floor.
Advantages of a cellar located under the house
There are many positive aspects that speak in favor of installing a vegetable storage facility directly under the house. First of all, there is no need to allocate a separate place for construction, which is especially important for small garden plots. In winter, you don’t need to dress specially to get a jar of cucumbers or a few potatoes for borscht.
If the groundwater level is high, there is no need to install a separate drainage system, which will require additional material investments. And only one pit will need to be made. It should be noted, however, that if the water level in the ground is high, it is not recommended to create a cellar located under the house, since it will be too damp, and during the period of snow melting, water will most likely appear in the vegetable storage. Although good waterproofing and underground drainage can correct the situation.
Construction of a cellar during the construction of a house
Responsible owners are concerned about the question of how to build a cellar located under the floor of the house correctly, so that no problems arise later, and its photo can be shown to friends. There can be only one answer here - it is necessary to carefully approach all stages of construction, from excavation work to the installation of shelving. This structure must be erected at the stage of laying the foundation, since subsequently dismantling the floor and digging a deep and wide hole under it will be difficult and impractical. During the construction process you will need:
- dig a pit;
- build walls;
- perform waterproofing and, if necessary, thermal insulation;
- install the ceiling and hatch;
- make cellar ventilation under the house;
- fill the floor with sand or pour concrete;
- finish the internal surfaces;
- install drawers and shelves;
- build a ladder.
To prevent a “surprise” in the form of leaking water from accidentally appearing in the cellar during a flood or heavy, prolonged rainfall, before starting to dig a pit, you will need to find out at what level the groundwater lies. You can look into the nearest wells, and if there are none, drill a well at least 2.5 meters deep and wait a couple of days to see whether water appears in it or not.
The depth of the cellar is determined depending on the groundwater level (GWL), taking into account the requirements for its minimum depth of 1.8 meters. At shallower depths:
- it will be inconvenient to stay and move in the storage;
- the air temperature will rise 7–8 degrees higher, which will affect the preservation of vegetables.
The ideal option is the distance from the groundwater horizon during a flood to the cellar floor - at least a meter. For lower values, enhanced waterproofing of the walls and floor of the building or the construction of a separate semi-underground cellar will be required. Photos of similar buildings can be seen here. The optimal depth of the cellar under the house is considered to be 1.9–2.25 meters.
The storage area for vegetables must be at least five square meters. The dimensions of the pit are determined taking into account the thickness of the walls (25–30 cm) and the cavities intended for applying waterproofing and installation on the outside of the clay castle. The walls of the cellar are made from:
- monolithic reinforced concrete;
- red brick;
- cinder blocks;
- logs
After installing a sand cushion (up to 20 cm high), laying a layer of crushed stone (10 cm thick) and a reinforced wire mesh (0.6 cm in diameter), the floor in the cellar is filled with concrete. In this case, it is necessary to maintain the slope of the base towards the technical pit intended for collecting condensate or in case of groundwater.
Then the installation of heat, steam and waterproofing of the floor and hatch is carried out. This will avoid the appearance of excessive condensation on the ceiling, the penetration of cool air and a specific smell into the house. A simple cellar decoration involves covering the walls with wood materials such as slab or clapboard. Look at the photo to see what it looks like in reality. To avoid the appearance of mold and rotting processes, they are treated with compounds containing an antiseptic.
An interesting fact is that finishing a cellar can be expensive and exclusive. For example, in the photo of wine cellars you can see that they are lined with natural expensive materials and decorated with exclusive elements. Inside there are chairs, tasting and chess tables, and audio systems. And all this, if desired, can be done directly under your home.
Waterproofing
If water penetrates into the cellar, you do not have the slightest chance of saving the harvest. But water will not be able to get inside the storage facility if its walls and floor are well insulated, and all cracks and seams are hermetically sealed.
Roofing felt glued to hot bitumen is traditionally used as waterproofing. The inside of the walls and floor can also be treated with penetrating waterproofing mastics and coating mixtures that have good adhesion. Special additives are added to modern waterproofing compounds and masonry mortars to increase moisture resistance and help create a durable layer that prevents breakouts or punctures. When choosing waterproofing, it is recommended to give preference to coating materials.
In the case of groundwater lying close to the surface of the earth, it is necessary to install a high-quality drainage system that will remove moisture not only from the cellar, but also from the entire house.
Ventilation
Installing the best waterproofing will not save your home vegetable storage from the presence of increased moisture in the absence of ventilation. The resulting condensation has a negative effect on vegetables and fruits in boxes, nets and containers. To get rid of it, you will need properly executed supply and exhaust ventilation of the cellar, the installation of which should be given special attention. Signs that ventilation is inadequate include:
- stale, heavy air;
- the appearance of mold and mildew;
- feeling of dankness and dampness.
Ventilation is installed from two sections of pipes, which are located in opposite corners of the cellar. One of them, the exhaust one, is installed under the ceiling, and the other, the supply one, half a meter from the floor. Both pipes should go out to the street at the same level, but it is allowed for the top of the supply pipe to be lower.
For forced ventilation, an electric fan is installed in the exhaust pipe. Additionally, quicklime helps remove unnecessary moisture; a bucket of it is placed in one of the corners of the building.
The cellar under the house is very convenient to use and pleases its owners in the winter season. In numerous photos posted on the Internet, you can see excellent examples of such premises. But for its proper functioning, a number of requirements must be met, including the installation of reliable waterproofing and ventilation. With the right approach, this is not a very difficult task, so you shouldn’t just place vegetables underground; it would be wiser to dig a full-fledged cellar.
As you know, our people are strong in hindsight. This statement fully applies to the situation when they first build a house, operate it, and then suddenly begin to realize that they were in vain not thinking about the basement.
And in fact, the basement under the house is a multifunctional room that allows you not only to store winter supplies, but also to store many seasonal items, garden tools, watering hoses, etc.

Of course, when the house is already built, you can’t dream of a large basement, since any excavation of the soil inside the existing foundation is extremely undesirable.
If this is a light summer house, standing almost on the ground, then the problem is not difficult to solve, but if the house is solid with heavy walls and roof, the problem becomes more complicated. In addition, it is not possible to dig a hole for a basement under every house. For example, if the foundation is a monolithic slab, then nothing will work.
The main advantage of this method of building a basement is the ability to do all the work yourself.
Among the disadvantages are the following:

- The need to carry out all work manually due to the impossibility of using technology.
- Soil is removed through living quarters, which is not very convenient for both workers and household members.
- Not everyone can correctly install ventilation and foundation, which in the future can make it difficult to use the basement for its intended purpose, as well as lead to dampness in it.
If it is possible to make a basement during the project, you should prefer this option. The room will be much larger in area and better equipped.
So, the basement can play the role of:
- technical room;
- garage;
- ground floor;
- workshop;
- cellar
In the case where the site primarily serves as a garden, the presence of a cellar in the house is very important, since annual harvests, as well as canned goods, require storage space. In principle, a cellar can be built outside, but storage made inside the home allows you to save space on the site. In addition, the internal cellar provides constant and quick access to the supplies stored there (despite weather conditions, time of day and other factors).
For homeowners who like to do something with their own hands, a multi-purpose workshop in the basement is a great solution. It can, if desired, be divided into a work area and a warehouse. In another embodiment, a number of shelves or cabinets with tools and finished products (products) can be located around the perimeter of each wall.
The ground floor can be equipped for a variety of types of useful premises: a music studio, an art workshop, a rehearsal room, a home cinema. With the same success, the ground floor can become a disco bar, a children's playroom, a billiard room or a gym.
If high-quality, modern materials for sound insulation are used when equipping the basement floor, then, regardless of the further functionality of the room, unnecessary sounds will not disturb your household above, as well as your neighbors.

Stages of construction work
The arrangement of a technical room in the underground is usually undertaken with the goal of moving there all sorts of large-sized technical equipment (water heaters, boilers, boilers, etc.), which takes up a lot of space in the house.
So, let's start equipping the basement, and we start with waterproofing. Waterproofing in this context will be divided into external and internal.
We arrange waterproofing
We arrange external waterproofing as follows. We cover the floor of the room with a clay layer, lay two layers of roofing material on top, and then coat the top layer with mastic with a bitumen base. The gaps from each of the walls should be filled with a mixture of sawdust and clay and covered with roofing felt. In the case where the gap is too wide (more than ten centimeters), it is recommended to use pieces of ceramic bricks instead of clay and sawdust.

To install internal waterproofing, we take the following steps:
- we coat the joints of the walls with the floor, in layers of 3-4 centimeters, using bitumen putty;
- in case we are dealing with block or brick walls, we repeat the same procedure with other joints;
- Before the concrete floor is completely dry, it should be covered with a penetrating waterproofing material. Another option is to wait until the floor is completely dry and coat it with bitumen paste;
- We install the reinforcement frame and apply a layer of plaster, the thickness of which should be at least 3 centimeters.
We insulate the room
The basement is a priori the coldest room in the house, so installing additional insulation is a must. It is necessary to insulate the underground in order to maintain a stable temperature in it, as well as to prevent the formation of condensation. It is also very important to prevent excessive cooling of the room. In conditions of poor thermal insulation or in the absence of it, damage to products and other items located in the basement will inevitably be caused, in addition, the interior decoration of the room will gradually (but also inevitably) deteriorate.
The installation of thermal insulation in the underground should begin no earlier than five full days have passed, after the complete completion of waterproofing work (complete drying).

So, the process of insulating a basement can be divided into the following two stages:
- We cover the floor with thermal insulation film, then apply a layer of sand (5cm) and crushed stone (10cm) on top of it; for reliability, it makes sense to lay another insulating layer of polystyrene foam;
- We insulate the walls. To do this, we line them on the inside with mineral wool, and then cover each wall with sheets
In the same way, the ceiling can be effectively insulated in the future.
We deal with the floor and ceiling
The ideal solution for a basement is reinforced concrete floor equipment. In cases where the floor is poured before the construction of wall structures, free space for formwork should be left before reinforcement and concreting begin. If the walls are already ready, then special formwork will not be needed.
For the construction of the ceiling in the underground, it is best to use concrete slabs. When working on the ceiling, be sure to remember about the arrangement of ventilation holes.

We build walls
Most often, when building a basement, three types of walls are erected: brick, concrete or block.
In version with concrete walls The construction process goes like this:
- a trench is dug, which surrounds the finished or future floor around the perimeter;
- formwork is equipped
- reinforcement is performed;
- concrete is being poured.
Construction block wall should start with corner laying. During the laying process, each block must be carefully aligned. Fastening is carried out using a special adhesive solution.
If you have made a choice in favor brick wall, it should be taken into account that in this context, the use of only ceramic, but not silicate bricks, is relevant. Here, laying is also done from the corners and is carried out in this way up to the eighth row of bricks.
Laying should be done with the utmost care, this is the only way to avoid marks on the inner sides of the walls.

We equip ventilation
The choice of ventilation scheme is determined by the purpose of the basement itself. Most often, a standard pull-out or natural ventilation system is used. The two main elements of equipment for such a system are exhaust and supply pipes. The optimal pipe diameter is ten centimeters or more.

It is recommended to equip the upper ends of the pipes with bird protection in the form of a thick mesh or damper, which can simultaneously protect the ventilation from moisture penetration. Such a damper is especially relevant when using the basement as a workshop or basement.
Video: Do-it-yourself cellar in an outbuilding
Read the same with this material:
It has the optimal combination of technical characteristics and capabilities.
It has a high load-bearing capacity and efficiency, allowing you to build large and massive houses on a relatively small supporting structure.
An important feature of the tape is the ability to combine it with additional elements, in particular with a basement.
Unlike most alternative options, the tape is fully adapted to the construction of an underground room without interfering with the base structure.
In addition to the main functions, the basement allows you to monitor the condition of the concrete strip and maintain it if necessary.
Let's take a closer look at the basement construction technique.
The difference between a basement and a cellar lies in two factors:
- Location. If the basement is an element of the foundation of the house and cannot be separated from it, then the cellar can be built either directly under the house or at a distance from the building, in any convenient place.
- Purpose. The cellar was traditionally intended for storing food products stored for the winter. The basement has a wider list of functions, from storing supplies for the winter to creating a workshop, warehouse, gym or other needs.
The most fundamental difference between these structures can be considered the temperature regime. If the storage of food requires a lower temperature, which promotes the preservation of preparations, vegetables, etc., then the functionality of the basement requires higher temperatures, comfortable for performing various works.
In addition, if a cellar can be built on a finished building, then the underground is large and is built only during the initial construction of the building.
The strip foundation allows you to provide almost any temperature regime in the basement, depending on the purpose. This type of base allows you to obtain the maximum basement area corresponding to the size of the above-ground floors.
If necessary, it can be equipped as housing, although less comfortable than the usual premises on the upper floors.
Conditions for building a basement
The main condition for the construction of a basement is a low level of groundwater. If they are located too close to the surface, the basement will be damp and the concrete floor will be subject to heaving loads.
Given the large area, their size may be critical and deform the base along with the concrete slab. If the depth of groundwater is too close to the basement floor, seasonal fluctuations can provoke a sharp increase in loads, the consequences of which can be very disastrous.

What should be the depth of the strip foundation?
To build a basement, it is necessary to immerse the tape in the ground to a depth below the freezing level. This is the minimum value; in practice, they are most often guided by the height of the basement, the thickness of the sand preparation layer and the concrete floor.
In total, the depth of the belt can be laid in excess of 2 m. It must be taken into account that under such conditions the side surface of the belt has a large area, which contributes to an increase in horizontal loads on it from the outside.
Their size can be reduced only by expanding the pit and increasing the layer of filling of the sinuses, which compensates for pressure and performs drainage functions. The volume of waterproofing work and the overall consumption of building materials increases, especially in the presence of concrete.
The calculation of the basement structure must be carried out by a competent specialist; acting “like a neighbor” in this case is too risky.

Construction over part of the house and over the entire area
A strip foundation allows you to create a basement both under the entire house along the perimeter of the external walls, and under part of it.
There are individual cases of constructing underground premises that exceed the size of the above-ground part of the house, but they require separate consideration due to the complexity of calculations and construction.
In most cases, when the size of the basement is smaller than the total area of the base, the depth of the tape is taken according to the conditions of the building parameters. For the basement, a separate pit is dug with a deeper foundation, creating a sufficient height for the room
The pit is inscribed in the general perimeter of the belt. This option is used in cases where it is possible to use tape option.
If it is necessary to build a full-fledged buried foundation, the basement is formed by removing soil in the desired section of the tape.
Waterproofing
Cutting off the tape from contact with water is a mandatory element that helps preserve the working qualities of the material and increase the service life of the base. Traditional method, which has been used for many decades, is to apply a layer of heated (molten) tar to the side surfaces.
To cut off horizontal surfaces, a double layer of roofing material is used, glued inside with bitumen mastic. The bottom layer is laid before installing the armored belt, and the top layer is applied after curing and hardening of the material.
Modern materials for waterproofing make it possible to form high-quality protection for concrete from moisture. The most effective are impregnations that penetrate the surface layer of the material and completely eliminate the possibility of capillary penetration of water into it.
NOTE!
Most builders do not yet trust new and little-tested means, preferring proven methods - applying a layer of bitumen mastic or hot tar.

General installation diagram
The construction of basements is carried out simultaneously with the construction of the general foundation. This allows you to obtain a strong, monolithic base with maximum load-bearing capacity and resistance to external loads.
There is a technique with basements that uses foundation blocks (FBS), but this technology is mainly used for the construction of massive multi-story buildings.
Let's consider the procedure for pouring a monolithic concrete strip:
- Preparing the site, marking, digging a pit.
- Preparing a trench for the tape at the bottom of the pit.
- Creating a layer of sand backfill.
- Laying a layer of waterproofing.
- Installation of formwork.
- Creation of a reinforcing frame.
- concrete.
- Allow the concrete strip to cure until the material hardens completely.
- Stripping, applying waterproofing.
- Further work.
The procedure is indicated schematically, without details. Details depend on specific conditions, hydrogeological conditions, soil composition, etc.
Several additional actions may be necessary - drainage, or other operations that are applied as necessary and according to design data.

Installation of formwork
usually done right on site. The material is wood (edged board 25-40 mm thick) or plywood. Shields are assembled, the width of which corresponds to the height of the tape with some technological margin.The assembled panels are installed in their places, aligned along the axes of the tape and fixed with stops in increments of 0.7-1.2 m. The distance between them determines the thickness of the tape and is fixed with crossbars. When assembling, it is necessary to ensure maximum density.
Gaps or gaps larger than 3 mm are not allowed. If large gaps appear, use tow or fill the gaps with wooden slats. The installation of the formwork is carried out carefully and firmly so that when pouring it is possible to withstand the loads and weight of the concrete.
Plywood formwork allows you to obtain maximum quality tape, a simpler and more airtight structure.

Selecting reinforcement and its diameter
The diameter of the reinforcing bars used on strip foundations depends on the width of the concrete strip. Typically, rods with a diameter of 10-14 mm (working) and 6-8 mm (smooth, auxiliary) are used.
For a strip width of up to 20 cm, a 10 mm rod is usually used, and for a strip thickness of up to 30 cm, rods with a diameter of 12 mm are used.
For tapes with a thickness of more than 30 cm, a diameter of 14 mm is used, but such parameters are rare in private housing construction. The most common rods are 12 mm, which can ensure the stability of almost any tape structure in low-rise construction.

Reinforcement
The reinforcement frame is a spatial lattice located inside the tape. The parameters of the armored belt are selected from the rods 2-5 cm inside the concrete. With a basement height of about 2 m, the belt usually consists of two gratings, consisting of 3-4 rows of horizontal (working) rods with fins.
They take on axial tensile loads in all directions, stabilizing and strengthening the tape.
All loads, both vertical and horizontal (directed at the side walls of the tape) will be compensated by working rods, and smooth reinforcement is used only to fix them in the desired position until concrete is poured.

Knitting reinforcement
The assembly of the arm belt is usually done by knitting with soft annealed wire. This connection method does not require connection to the power supply network and allows you to obtain a fairly strong connection between the elements.
Knitting is done by twisting two rods in a cross or longitudinal direction. A piece of wire, folded in half, covers the joint, after which a special hook engages the loop and makes a tight twist with a rotational motion.
This does not require any special skill; the skill is acquired very quickly.

Fill
is made from several points to ensure uniformity and consistency of the tape. It is recommended to use at least M200 or M250, which allows you to obtain a high-quality and load-resistant concrete monolith.Before starting work, you should prepare everything and organize the delivery of concrete so that all work is completed in one go. The presence of cold seams dramatically reduces the quality of the tape, posing a threat to the entire building.
After pouring, bayoneting or processing with a vibrating machine is performed to remove small air bubbles. Curing of concrete lasts 28 days. For the first 3 days, the tape is watered every 4 hours, after which it is covered with polyethylene.
NOTE!
Then, for 7 days, watering is carried out three times a day. The formwork can be removed 10 days after pouring.

Final stages of work
After curing is complete, the surface of the tape is covered with a layer of waterproofing, insulated (if necessary) and the sinuses are filled. After compacting the backfill layer, a concrete blind area is poured, cutting off the sinuses from contact with rainwater flowing from the walls or from gutters.
This allows you to significantly reduce the possibility of moisture penetration into the backfill layer and relieves the drainage system.
Ventilation
Ventilation holes (vents) are made in the upper part of the tape along the short sides of the perimeter. They are located in pairs, opposite each other in the corners and evenly along the entire length in increments of 1.5-2 m.
These openings organize air exchange in the basement, removing excess moisture and helping to dry the walls, eliminating mold, mildew and other undesirable manifestations.

Useful video
In this video you will learn how to build a monolithic strip foundation with a basement:
Conclusion
Construction of a basement allows you to significantly increase the usable area of the house, create space for a workshop, storage or other needs.
To create a basement, a large amount of materials and excavation work will be required, so it is necessary to prepare a place in advance for storing the excavated soil, and also be prepared for increased financial costs.
The construction technology differs little from the method of creating a conventional tape, the only difference is in the height of the walls and the amount of work on insulation and waterproofing.
In contact with