A friend of our club sent a very interesting material about how he decorated tea storage vessels (teapots) with papers from Pu-erh pancakes with his own hands.
=============================================
DIY teapots for Chinese tea
If I used to drink mostly Shu Pu'er, then having made it a rule to drink tea every day, I became addicted to many other varieties.
Having bought Tie Guan Yin from a fresh harvest, a couple of months later I was sad to discover that the tea was scorched and the taste began to differ somewhat from the original.
Having studied the assortment of tea stores, I sadly realized that there is nothing that I really like and will help the tea not spoil.
Now about the process
To make it you will need:
1. A friend at a tea shop (or your own supply of rice paper, which may have artistic value in addition to its practical value). In general, you need rice paper in which to pack your favorite tea pancakes.
2. Acrylic paint. It has virtually no odor (since it is made on a water basis), dries fairly quickly and has good adhesion.
3. Matte water-based varnish. You can buy acrylic paint at an art supply store.
4. PVA glue.
5. Brushes.
6. Containers that will be used as a basis.(I took Luminarc Box Mania Wood)
Optional:
7. Skin of small and large fractions
8. Tung natural oil (no solvents)
Go!
We prime the jars:
The number of layers of acrylic is at your discretion, but I think three is acceptable. After applying the third layer, let it dry thoroughly. It is better to apply the third layer at night to protect yourself from the temptation to test the results.

Then we glue the main layer of rice paper on which we will apply our design. Naturally, it is recommended to do this from the same package so that the color does not stand out. In order for the glued mass of rice paper to have a uniform appearance, it is necessary to adhere to the following technical process:
We tear with our hands (in no case cut with scissors) the packaging from the tea pancake, separating the pattern from the background.
We tear off the edges of the packaging with a thin strip to get rid of machine cutting. If this is not done, transitions will be visible when gluing the pieces on top of each other.
We will use the resulting pieces without a pattern as a base.


We glue the entire outer area of the jar with rice paper.
It is very important not to pour a lot of PVA glue, otherwise the paper will absorb it and the result will not be very aesthetically pleasing.
To achieve uniformity in color and hide the primer, you need to glue about three layers on top of each other.


Let's return to the covers. The selected cans for the base have a very rough varnish,
which is unpleasant to the touch and smell. Remove it with coarse sandpaper. It is very important to remove the varnish completely, otherwise the oil will not be absorbed in places where the varnish is not removed. To make sure that the varnish is completely removed, it is better to wipe the lid with a damp cloth. After we are convinced that the varnish has been completely removed, we sand it with fine sandpaper until a pleasant tactile sensation appears over the entire area of the lid.
If you make wooden lids for jars yourself on a lathe, for example, you can take into account the fact that different types of wood absorb oil differently. Accordingly, when contacting tung oil in several layers, you will get a darker or lighter final shade.
Why was tung oil chosen as a stain and wood protector? It's simple. It has antiseptic properties, repels moisture, is natural (does not contain solvents), gives a pleasant color and emphasizes the texture of the wood.


A very important point at this stage is not to apply oil in excess. You literally have to rub the oil all over the surface with a brush.
After drying, you will have to remove excess oil with a rag using considerable force. By the way, yes! Oil is prone to self-ignition. So dispose of oil-soaked rags and wipes either in the trash or in the oven.
What is never short of in the kitchen are jars for various types of bulk products, spices, coffee, tea, etc. It’s rare to find a set in a store that will completely satisfy the housewife in shape, size, quantity and design. But you can make decoupage of cans in one style, using not only purchased cans, but also adapting others for these purposes.
In any kitchen there is always a multitude of glass jars of various sizes that sit idle and gathering dust. So, their time has come. Today we will tell you how to decoupage a glass jar: a master class with a detailed description of each step and photo will help you with this.
Decoupage of jars for the kitchen: master class
To work on the jar you will need the following materials:
- glass jar
- napkin or card for decoupage
- acrylic paints
- alcohol
- PVA glue or for decoupage
- scissors
- acrylic lacquer
- brush

Instructions for decoupage jars:
1. Preparing the jar. If there are any stickers on the jar, they need to be cleaned off. After which the jar is thoroughly dried and wiped with alcohol to degrease the surface. We paint the jar in 2-3 layers with acrylic paint of the selected color. Dry it.
2. Choice of motive. We decide on the future design of the jar, select the desired design and cut it out or tear it out of a napkin (after first separating it from the lower layers) or from a decoupage card.

3. Decoupage jars. Using a brush and glue (PVA or decoupage), glue the selected motif onto the jar. Make sure there are no wrinkles on the napkin. Let it dry.

4. Final stage. We cover the jar with acrylic varnish in 2-3 layers, this will protect it from negative external influences.

This is how easy it is to create a bright and stylish jar for bulk products.

Spices are usually stored in small containers, so you can decoupage spice jars using baby food jars using the instructions described above in our article.


And you can use old coffee cans to store coffee beans. To decoupage coffee cans, just select the appropriate motifs for decoration, and new stylish jars for different types of bean coffee will appear in your kitchen, such as in our master class:


Decorating a tin can in decoupage style
Tin cans are often stored in the depths of kitchen cabinets - they are convenient, durable, but their appearance does not allow them to be put on public display. Therefore, we have prepared for you a master class on decoupage of a tin can.
Materials you will need:
- tin can, for example, for tea
- napkins for decoupage
- primer
- alcohol
- acrylic paints (ochre, bronze, white)
- decoupage glue or PVA
- craquelure varnish
- medium Antique
- brushes
- sponge
- acrylic lacquer
Instructions for decoupage jars
1. Preparing the can: degrease with alcohol and paint with dark paint (it will appear through the cracks of the craquelure in the future).
2. After the paint has dried, apply craquelure varnish (the brush moves in one direction).

3. When the varnish dries a little (15-20 minutes), paint the jar a light color. In our master class we mixed white and ocher. Apply the paint in a direction different from the varnish in one layer.

After some time, cracks appear (the thicker the layer of varnish, the thicker they are)

4. After the paint has dried, we begin directly decoupaging the jar. Cut out or tear out selected fragments of the design from the napkin. Glue them to the jar using decoupage glue. We make sure that no folds form.

5. Take the Antique medium and use a sponge to shade the edges of the jar.

6. We cover the entire jar with acrylic varnish in 2-3 layers and our jar is ready to become a decoration on the kitchen shelf!

We hope that our article will help you make the world around you a little brighter.
Video selection to help beginners
Cover the metal surface of the box with acrylic primer, applying it in 2-3 layers, so as to completely cover the metal. In this case, each layer must dry thoroughly before applying the next one. The primer can be applied using a small roller or a piece of sponge.
Step 2
When the soil is dry, cut the patterned paper into strips. If the paper is thick enough (for example, for scrapbooking), dip it in water for a few seconds, then remove it and remove excess water from the surface. Apply PVA glue to the back of the strip and stick the strip on.
Step 3
Copy from a herbal medicine or plant reference book or print from the Internet images of plants that you collected in the summer and dried (raspberry leaves, currant leaves, thyme, mint...). Cut them out. Tint the edges of the picture with a brewed and slightly squeezed tea bag.
Step 4
Glue the finished design on top of the paper strip. Smooth it out and leave it to dry.
Step 5
Mix acrylic paints to create ivory paint. Tint the jar and the edges of the jar lid using a sponge. You can apply paint of a darker tone with a sponge.
Many people have unwanted jars left over from tea at home. You can easily make an original souvenir and useful item from them. An Indian style tea jar is made using the technique. The main thing here is to show your imagination and imagination.
To complete this you will need:
- Cardboard box or tea can.
- Acrylic paint for construction.
- PVA glue.
- Napkins with matching motif.
- Gouache paints.
- Contour with glitter, pearlescent.
- Different brushes
1. Cover the jar with a layer of acrylic. The paint should be applied evenly, carefully painting over the image on the can. Sometimes it is better to reapply a layer of acrylic so that the surface is perfectly smooth. We do the same with the lid.


2. Select the required motif on a napkin. In this case, it is an Indian elephant; you can also choose oriental ornaments and colorful floral motifs. Separate the lower thin layers of the napkin from the image. Using scissors, we cut out a small solid fragment of the design, which we will glue first.

3. Prepare the glue. Dilute a small amount of PVA with water and stir until smooth. We begin to carefully glue a fragment of the napkin onto the surface of the jar, smoothing out any wrinkles and bubbles that form. Usually the napkin fits well on the cardboard surface, so there shouldn’t be any big problems. Using our hands, we tear the napkin into small pieces and seal the edges of the jar, feel free to layer the fragments one on top of the other - this will only add volume to the image. Let the jar dry at room temperature.


4. For the surface of the lid, it is better to choose one complete fragment so that the pattern lies evenly, without overlaps. For example, here we use the eyes of an elephant. We seal the edges with colorful leftover napkins. Leave until the glue dries completely.


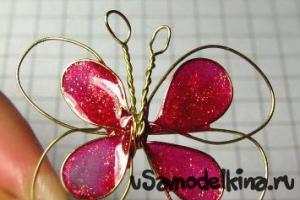
5. When the jar is dry, move on to decoration. Here you can safely show your imagination - highlight the elements of the picture with an outline, tint the edges with gouache, add sparkles. A gray pearlescent outline is perfect, which we apply to the top and bottom edges of the jar, and also cover the rim of the lid. To further highlight the edges and make them visually brighter, we’ll use gold paint. Feel free to cover individual fragments of the image with “gold”, draw a border, and add shine where appropriate. Let it dry for 10 minutes.
You can use anything for such needlework: ordinary glass jars, simple dishes, any bottles, glass, and even jars of chips and coffee. Try to make decoupage of jars for the kitchen, decoupage of plastic jars - and you will see how cool it looks on the shelves or on the table.

The meaning of this technique is to paste cut-out napkins, printed drawings, selected dishes or any interior item. After pasting, most often the entire surface is covered with a layer of protective varnish. This is if you want the item to last you longer.

The flower is not cut out of the napkin, but the edges are simply torn off.
Master class No. 1 – decoupage of enamel dishes
If you just want to try your hand at this technique, you will only need napkins or printouts, clippings from a glossy magazine, any acrylic paint, or regular stationery PVA glue.
Decoupage varnish (if you buy it in a special store - the price is steep) you can buy in a store for repairs, or you can make it yourself. There are 2 options for homemade varnish.
How to make Mod Podge (varnish) based on glue:
- 225 ml PVA glue.
- 112.5 ml water.
- 2 tablespoons water-based varnish (optional).
Mix everything in one jar, shake and close the lid. The varnish is ready.
How to Make Mod Podge Using Flour:
- 1 ½ (210 grams) cups flour
- ¼ cup (56.25 grams) granulated sugar.
- 1 cup (225 ml) cold water.
- ¼ teaspoon olive oil (optional)
- ¼ teaspoon vinegar (optional)
Mix all the ingredients in a ladle, beat a little with a fork, don’t forget about the vinegar. Turn on medium heat and bring to a boil. If it's too thick, add water. Bring to a boil, stirring, remove from heat. We wait for it to cool down and pour it into a jar with a lid.


You can start a master class for beginners. We choose the surface that we want to decorate and prepare the materials. The dishes can be decorated with any designs, such as cards, wrapping paper, magazine clippings, postcards, napkins, etc.
Images are printed only on a laser printer; they will be blurred on an inkjet printer.
To work you will need:
- White acrylic paint.
- Sandpaper (sandpaper).
- Brown acrylic paint.
- Brush.
- Mod Podge or DIY varnish from 2 options.
- Sponge
- PVA glue (diluted with water 1:1).
- Can, jug, mug - any enamel container.
We set up a work corner: lay down newspaper or paper. Degrease the surface (wash with water, then you can wipe with alcohol or cologne).

Print out the pictures and cut them out. We try to cut all the pictures at an angle so that the varnish adheres better.

Take a foam sponge (or a dish sponge) and “blot” the corners of the picture with brown paint. Place the tablet in water for 1-2 minutes. We need to remove the top layer on which there is a pattern. There are several ways to thin out an image.
You can simply split it (for example, office paper, cardboard), or you can, by attaching the picture with the reverse side, “roll up” the top layer with your fingertips.
Another “dry” way to split paper is with tape. We seal the pattern on the reverse side tightly across or along with strips of tape. It's better to use wide tape. Press the tape and paper firmly so that they stick together better. Starting from the corner, separate the layers of paper and carefully separate the top layer. Just do not tear sharply, otherwise the design may be torn.


We spread PVA glue on the place chosen for the picture, put the picture on this place, and also coat it with glue on top. After 30 minutes, cover the top with decoupage varnish or homemade varnish (recipe above). We put it aside and wait for the varnish to dry (2-3 hours), then you can go through it again, final. We made a vase from an old can.

Master class No. 2 – decoupage of a glass jar
We will make the next glass jar decoupage master class from ordinary glass jars; you can use them to make vases or stands for spoons and forks. Decoupage of glass jars should begin by soaking them in warm water, followed by removing the old labels.

Decoupage a glass jar is a good idea. For work we need everything that was in the first master class; PVA glue can be replaced with decoupage varnish (Mod Podge or homemade). If you use PVA glue, then it needs to be diluted with water 1:2 so that it is not too thick.

So, we print out pictures or cut them out from magazines, postcards, napkins, etc.
For work we take:
- Acrylic paints – white and black.
- Sandpaper.
- PVA glue.
- Decoupage varnish (can be replaced with homemade varnish: see above).
- Printouts or magazine clippings.
- Brush, sponge.

Apply primer to the glass. If you are a beginner artist, you can skip this moment; just cover the glass with black paint.

Apply black acrylic paint to the glass surface of the jar. Let it dry thoroughly.

We go along all the sides and bulges of the glass jar using sandpaper. We need this for the aging effect.

We print out the pictures and cut out the fragments with scissors. Place the cut out fragment on the file, take a brush and decoupage varnish (homemade varnish number 1, made from PVA glue: see above). Apply the solution to the fragment. We wait for it to dry and apply again, and so on up to 3 times.

Then put the fragment in warm water for 5-10 minutes. Using a brush, apply PVA glue to the center of the jar. Carefully, so as not to tear the picture, apply it to the jar and remove the top layer.

First we coat the picture with varnish, and then the entire jar. Dry and varnish again. This is how you can decoupage small and large glass jars.


Master class No. 3 – decorating a tin can
Next, we wash, degrease and dry jars, bottles, metal cans, flower pots, in general, everything that you are going to decoupage. In this master class we will decoupage a tin can. These jars are usually used to sell canned fruits or vegetables.
We start decoupaging cans by making sure there are no sharp edges or burrs. There are many ways to shape the edges: you can use pliers and bend the sharp tin edges inward, you can cut a wire with a diameter of 3-4 mm, and glue the vinyl top of the wire to the top of the can:


After we have washed and degreased the tin can with alcohol or cologne, and decorated the top, we need to apply dark acrylic paint to the surface of the can. This can be done with a brush or sponge. We are waiting for the paint to dry.

After the dark paint has dried, apply a layer of white acrylic. And we also wait for it to dry. You can cover it with white acrylic one more time.


We glue the pictures using the “file method”. Place the picture face down on the stationery file and pour water on top. Let's keep the pictures in water for 3 minutes and thin them after that. We drain the water, apply it to the desired place, press it, and remove the file. Using a brush, we smooth out and expel air bubbles, apply glue to the drawing. Smooth out evenly and straighten out wrinkles. We work from the center point to the edges. We go over the picture with a brush and glue. Let it dry. We apply varnish. Let's dry it. We repeat again.

Professionals apply 25-30 layers of varnish to the product, but we are beginners, 2-3 layers are enough for us.

Glass jars and bottles are processed in the same way. If the color of the glass is dark, then you don’t need to cover it with dark acrylic. Only use white paint and then sand with sandpaper.
Master class No. 4 – decoupage of cans for bulk products
And another master class using chip packaging. It is convenient to store tea, sugar, coffee. We repeat everything as in the first two works. As a result, you will get jars for bulk products.

Decoupage coffee jars. Very cute and cute decor.